How to fix common household problems yourself
Running toilets, sticking doors, tripped breakers, and squeaky floors: what usually causes them, how to fix them with basic tools, and when to stop.
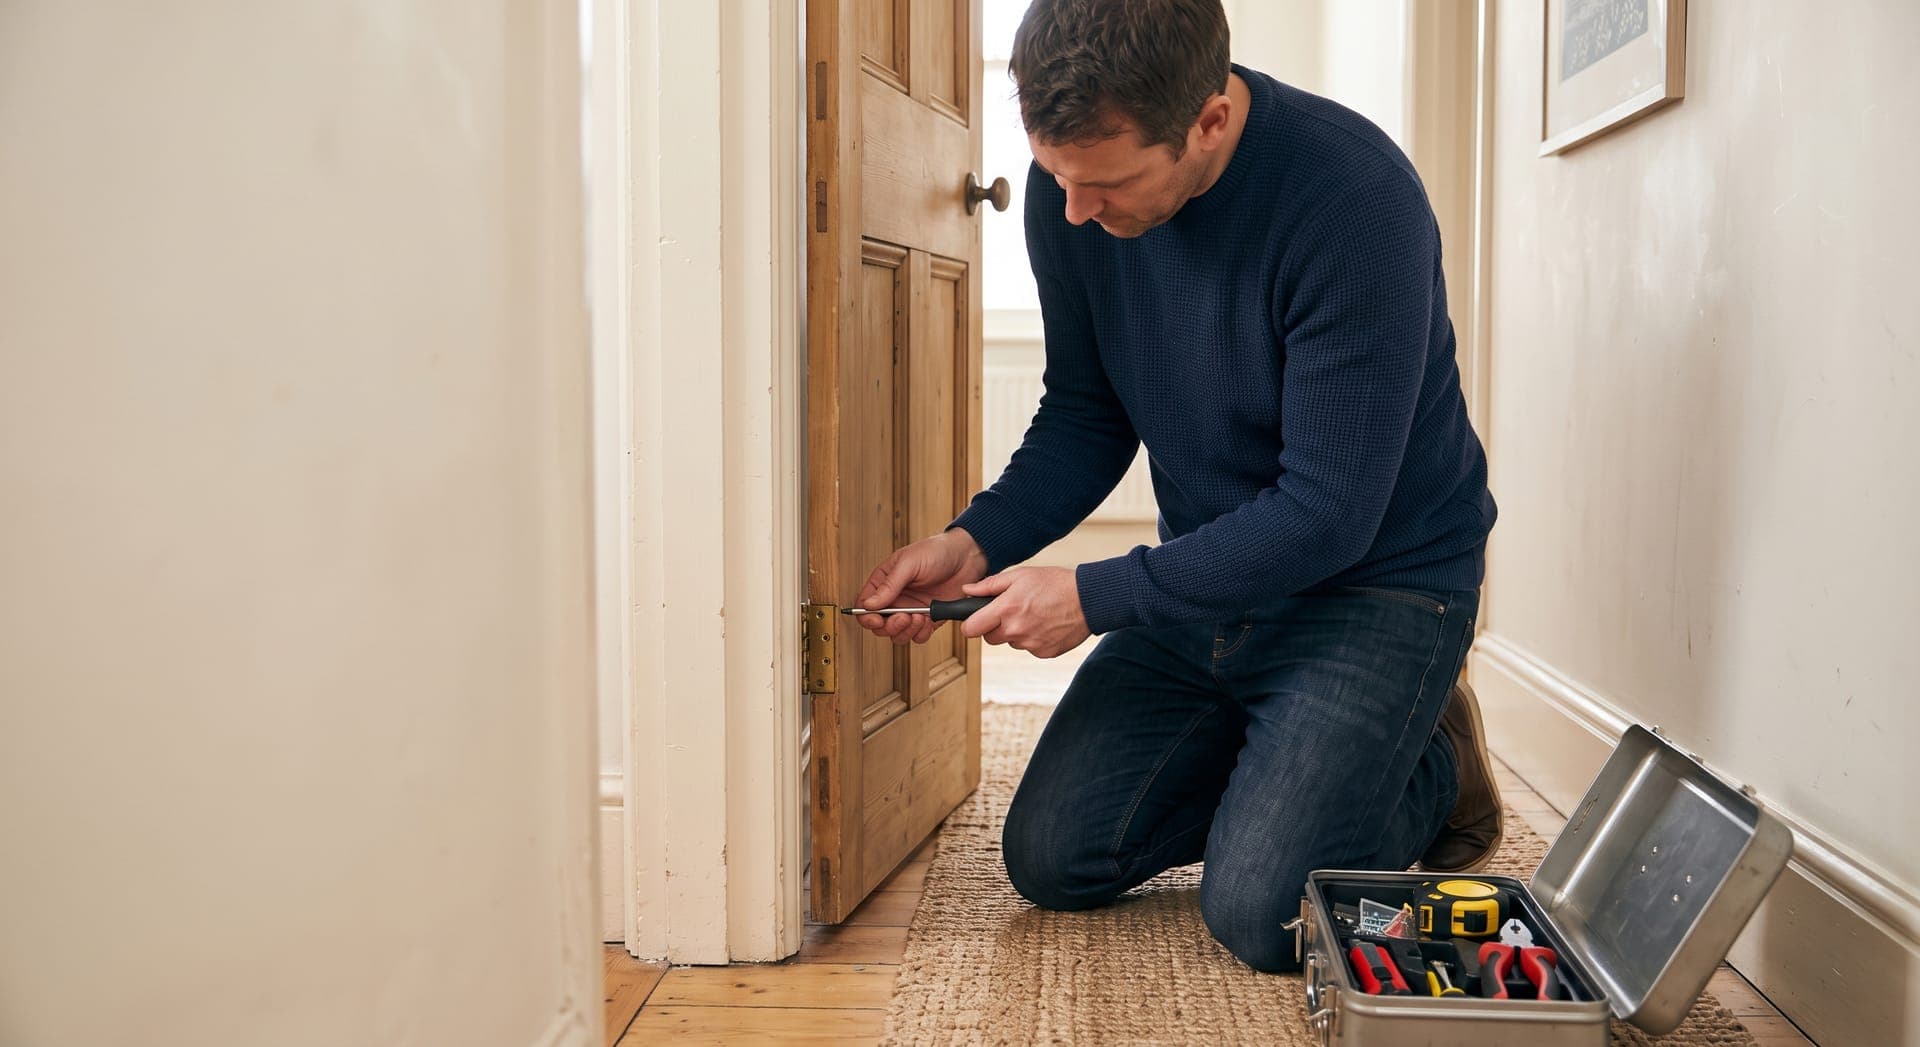
Most of the faults that make a home feel worn out have simple mechanical causes. A toilet runs because a rubber seal has gone stiff. A door sticks because a hinge screw has worked loose. A room loses power because a breaker did its job. With a screwdriver, a few inexpensive parts, and a clear idea of what to check first, you can fix many of these in under an hour.
This guide covers the problems that come up in almost every house and apartment, in the order you would usually check them. Renters should read their lease first: many landlords expect to be told about faults, and some repairs are their responsibility, not yours.
Know where your shutoffs are before anything goes wrong
Two habits prevent a lot of DIY trouble. Turn off the supply before you open anything up, and know where that supply is controlled before you need it in a hurry.
- Main water shutoff. Usually where the water line enters the house: in a basement, utility room, crawl space, or under the kitchen sink in some apartments. Turn it clockwise to close. If it is stiff or seized, ask a plumber to replace it before an emergency.
- Fixture shutoffs. Small valves under sinks and behind toilets. They let you work on one fixture without cutting water to the whole home.
- Electrical panel. Find it, and check that the breakers are labeled. If they are not, label them now with a helper switching lights on and off.
A basic kit covers everything in this guide: a multi-bit screwdriver, adjustable wrench, pliers, a flashlight, a utility knife, and a bucket and old towels. The guide to tools every beginner should own explains what each one is for.
A toilet that keeps running
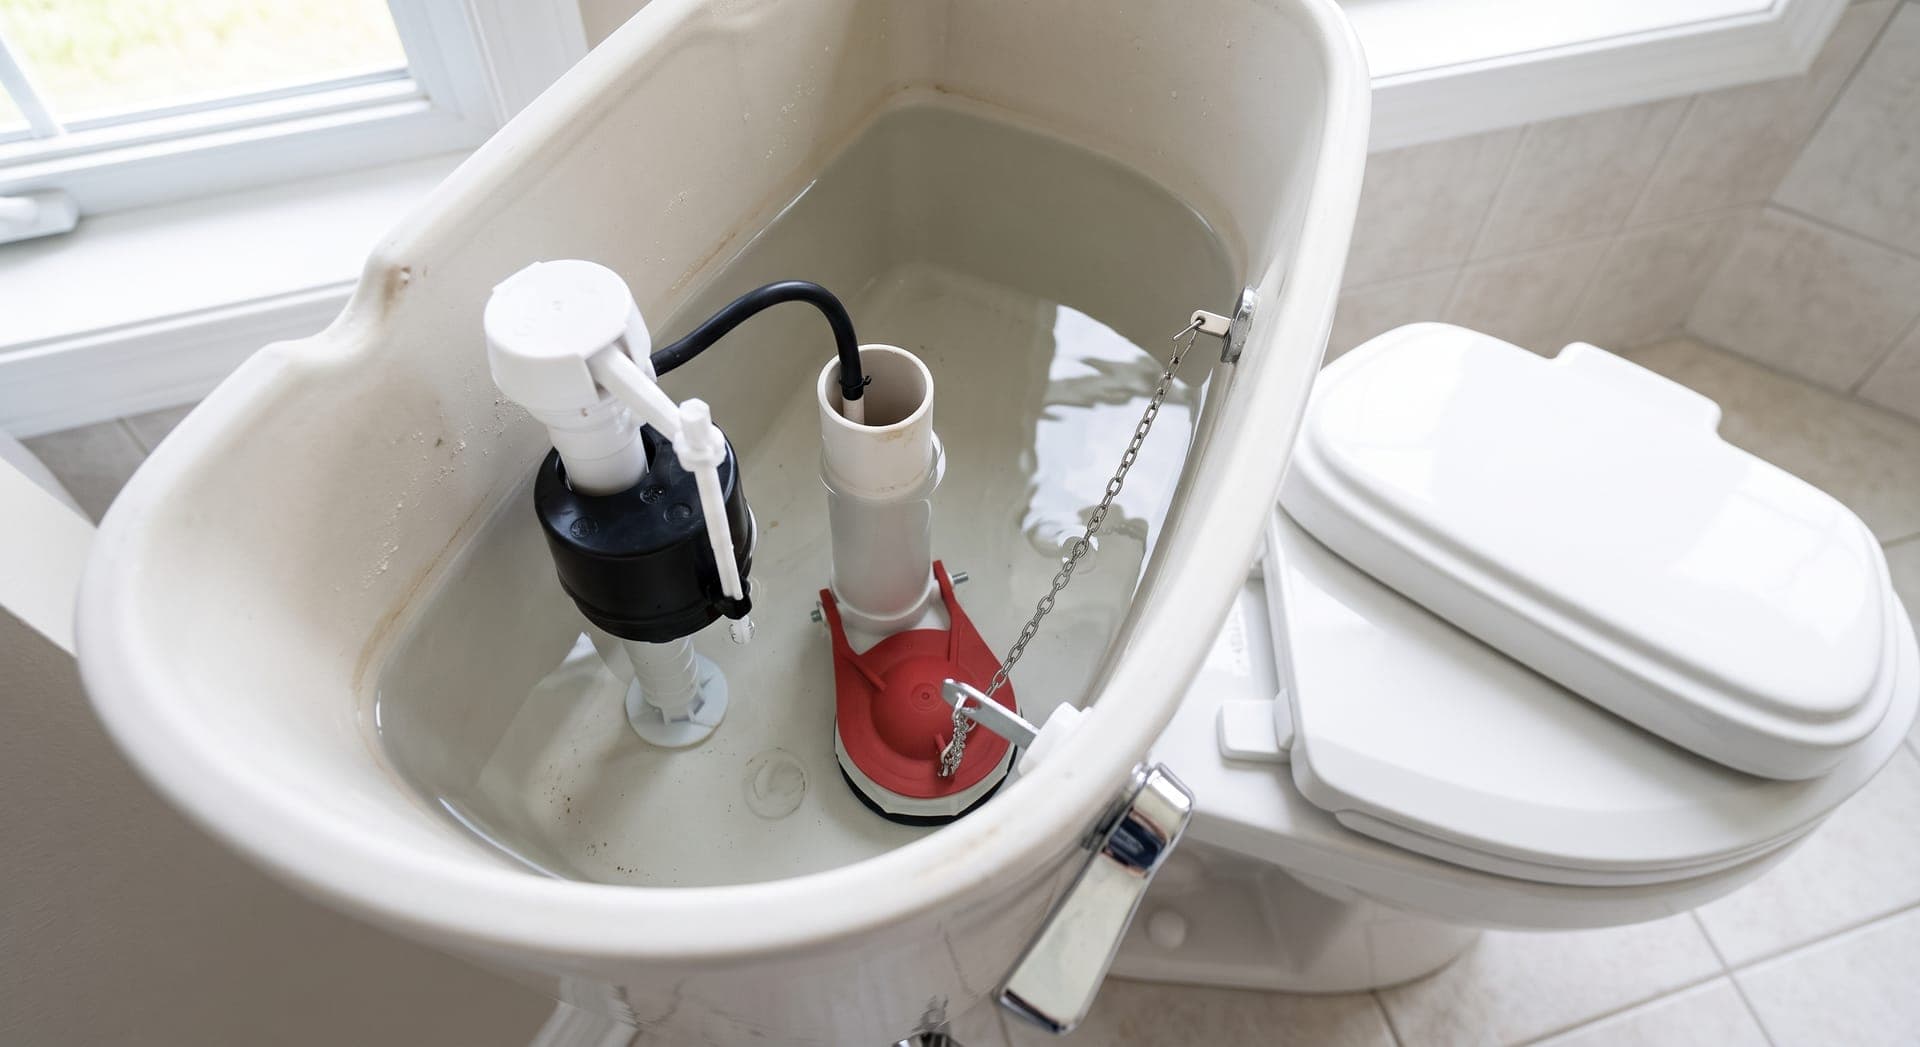
A toilet that hisses, refills on its own, or runs for minutes after a flush is wasting water around the clock. The cause is almost always inside the tank, and you can see all of it by lifting the lid.
Start by finding out where the water is going. Put a few drops of food coloring in the tank and wait about 15 minutes without flushing. If color appears in the bowl, the flapper at the bottom of the tank is leaking. If the bowl stays clear but the tank keeps refilling, look at the water level: if it is running into the open overflow tube in the middle, the fill valve is set too high.
If the flapper leaks
- Check the chain first. If it is so short that it holds the flapper slightly open, or so long that it gets caught underneath, adjust it so there is a little slack when the flapper is closed.
- If the chain is fine, turn off the valve behind the toilet and flush to empty the tank.
- Unhook the chain and unclip the flapper from the two pegs on the overflow tube.
- Take the old flapper to the hardware store so you can match its size. Most are 2 or 3 inches across.
- Fit the new flapper, connect the chain with a little slack, turn the water back on, and test with food coloring again.
If water runs into the overflow tube
Lower the float. On a modern fill valve, the float is a cylinder that slides on the valve shaft, adjusted by a screw or clip. On older toilets it is a ball on an arm, and you lower it by gently bending the arm or turning an adjustment screw. The water should stop about an inch below the top of the overflow tube. Many tanks have a line marked on the inside.
If the fill valve still runs or makes a loud hissing noise after adjustment, replacing the whole valve is a common DIY job. Replacement valves come with instructions and usually fit standard toilets.
A door that sticks or will not latch
Look at the gap around the closed door. An even gap means the door fits the frame. A gap that is wide at the top on the latch side and tight at the bottom means the door has sagged, which usually comes from loose hinge screws.
- Open the door and tighten every hinge screw, starting with the top hinge, which carries the most weight.
- If a screw spins without tightening, the hole is stripped. Replace one of the screws in the top hinge, on the frame side, with a 3-inch screw of the same diameter. It reaches through the frame into the wall framing behind it and pulls the door back up.
- If the latch still misses the strike plate by a small amount, you can file the opening in the strike plate slightly larger, or move the plate.
If a wooden door sticks only in humid weather, the wood is swelling. Wait for a dry spell, then lightly sand or plane the edge that rubs and seal it with paint or primer. An unsealed edge will soak up moisture and swell again.
A squeaky door hinge
Close the door, then tap the hinge pin up and out from below with a screwdriver and hammer. Wipe the pin clean, coat it with a thin layer of white lithium grease, silicone lubricant, or petroleum jelly, and tap it back in. Do one hinge at a time so the door stays hung. A thin spray lubricant quiets a hinge too, but it tends to wear off sooner and can attract dust.
A cabinet door that hangs crooked
Most modern kitchen cabinets use concealed hinges with two or three adjustment screws on the hinge plate inside the door. One screw moves the door left and right, another moves it in and out, and on many hinges a third adjusts height. Turn each screw a quarter turn at a time and close the door to check. Adjust both hinges on a door together when the gap is uneven along its whole length.
If the screws holding the hinge to the cabinet have pulled out of particleboard, fill the hole with wood glue and a few wooden toothpicks or a wooden dowel, let it dry, trim it flush, and drive the screw back in.
Power out in one room: tripped breakers and GFCI outlets
When lights or outlets in one area stop working, check the panel before anything else. A tripped breaker usually sits in the middle position or in the off position, out of line with the others.
- Unplug or switch off the things on that circuit, especially heaters, kettles, and other high-power appliances.
- Push the tripped breaker firmly to the off position, then back to on.
- Plug things back in one at a time.
If a bathroom, kitchen, garage, or outdoor outlet is dead but no breaker has tripped, look for a GFCI outlet, the type with test and reset buttons. One GFCI can protect several outlets further along the circuit, sometimes in another room. Press its reset button firmly.
Stop and call an electrician if
- A breaker trips again straight away, or trips with nothing plugged in.
- You notice a burning smell, scorch marks, buzzing, or a warm outlet or switch plate.
- A GFCI will not reset, or a breaker will not stay on.
Resetting a breaker is safe. Opening the panel, replacing outlets, or working on wiring is a job for a licensed electrician in most places, and the guide to when to call a professional explains why.
Squeaky floorboards
Floors squeak when a board or the subfloor moves against a nail or a joist. If you can reach the underside of the floor from a basement or crawl space, have someone walk on the squeaky spot while you look for movement. A thin wooden shim, coated with wood glue and tapped gently into the gap between the joist and the subfloor, often stops it. Tap gently: driving the shim too hard can lift the floor.
From above, a squeak in hardwood can be fixed with a trim-head screw driven through the board into the joist below, then filled with matching wood filler. Under carpet, kits exist that drive a scored screw through the carpet and snap off below the surface. Find the joist first with a stud finder so the screw lands in solid wood.
Drips, clogs, and wall damage
Three more problems are common enough to have their own guides:
- A dripping faucet is usually a worn washer, O-ring, or cartridge. See how to fix a leaking faucet.
- A slow or blocked sink usually clears with a plunger or by cleaning the trap. See how to unclog a sink.
- Nail holes, dents, and hairline cracks fill easily. See how to fix small holes and cracks in walls.
Mistakes that turn small problems into big ones
- Working on plumbing without closing the shutoff first, then discovering the valve does not fully close.
- Overtightening plastic fittings and porcelain parts. Hand tight plus a little more is usually enough. Cracked toilet tanks and split nuts are common results of too much force.
- Resetting a breaker over and over. It trips for a reason, and repeated resets can hide a fault that is getting worse.
- Buying a part before removing the old one. Take the old part with you, or photograph it next to a tape measure.
- Ignoring a small leak. A slow drip under a sink can rot a cabinet floor and grow mold long before you notice it.
When to stop and call a professional
Stop if a repair needs you to open the electrical panel, handle wiring, or work on gas appliances or lines. Stop too if water is coming through a ceiling, if a shutoff valve will not close, or if you find signs of structural movement such as new diagonal cracks above doors or doors that suddenly stop closing all over the house. Those need a qualified electrician, gas engineer, plumber, or structural engineer, depending on the problem.
If you smell gas, leave the building, avoid using switches or flames, and call your gas utility's emergency number from outside.
Questions about common household fixes
Do I need special tools for these repairs?
No. Everything here can be done with a screwdriver, pliers, an adjustable wrench, and a flashlight. A replacement toilet flapper or fill valve, a longer hinge screw, and some lubricant are the only parts most of these jobs need.
I rent my home. Should I fix these myself?
Check your lease and ask your landlord. Tightening a hinge screw is rarely a problem. Replacing parts in a toilet or faucet may be something your landlord wants to arrange, and reporting faults in writing protects you if a small issue later causes damage.
How do I know whether a problem is getting worse?
Take a dated photo when you first notice it. A crack you can compare against a photo, or a water stain you have outlined in pencil, tells you within a few weeks whether something is spreading.
Where to start
Pick the fault that bothers you most and fix that one first. Before you begin, find your main water shutoff and check that your electrical panel is labeled; those two minutes make every later repair safer. For a routine that catches problems early, the monthly home maintenance checklist takes these checks and puts them on a schedule.
This guide is general information. Homes, materials, and local rules differ, so check product instructions and the regulations where you live. Read the full disclaimer.