How to fix a leaking faucet
Most drips come from a worn washer, O-ring, or cartridge. Identify your faucet type, turn off the water, and the repair usually comes down to one replacement part.
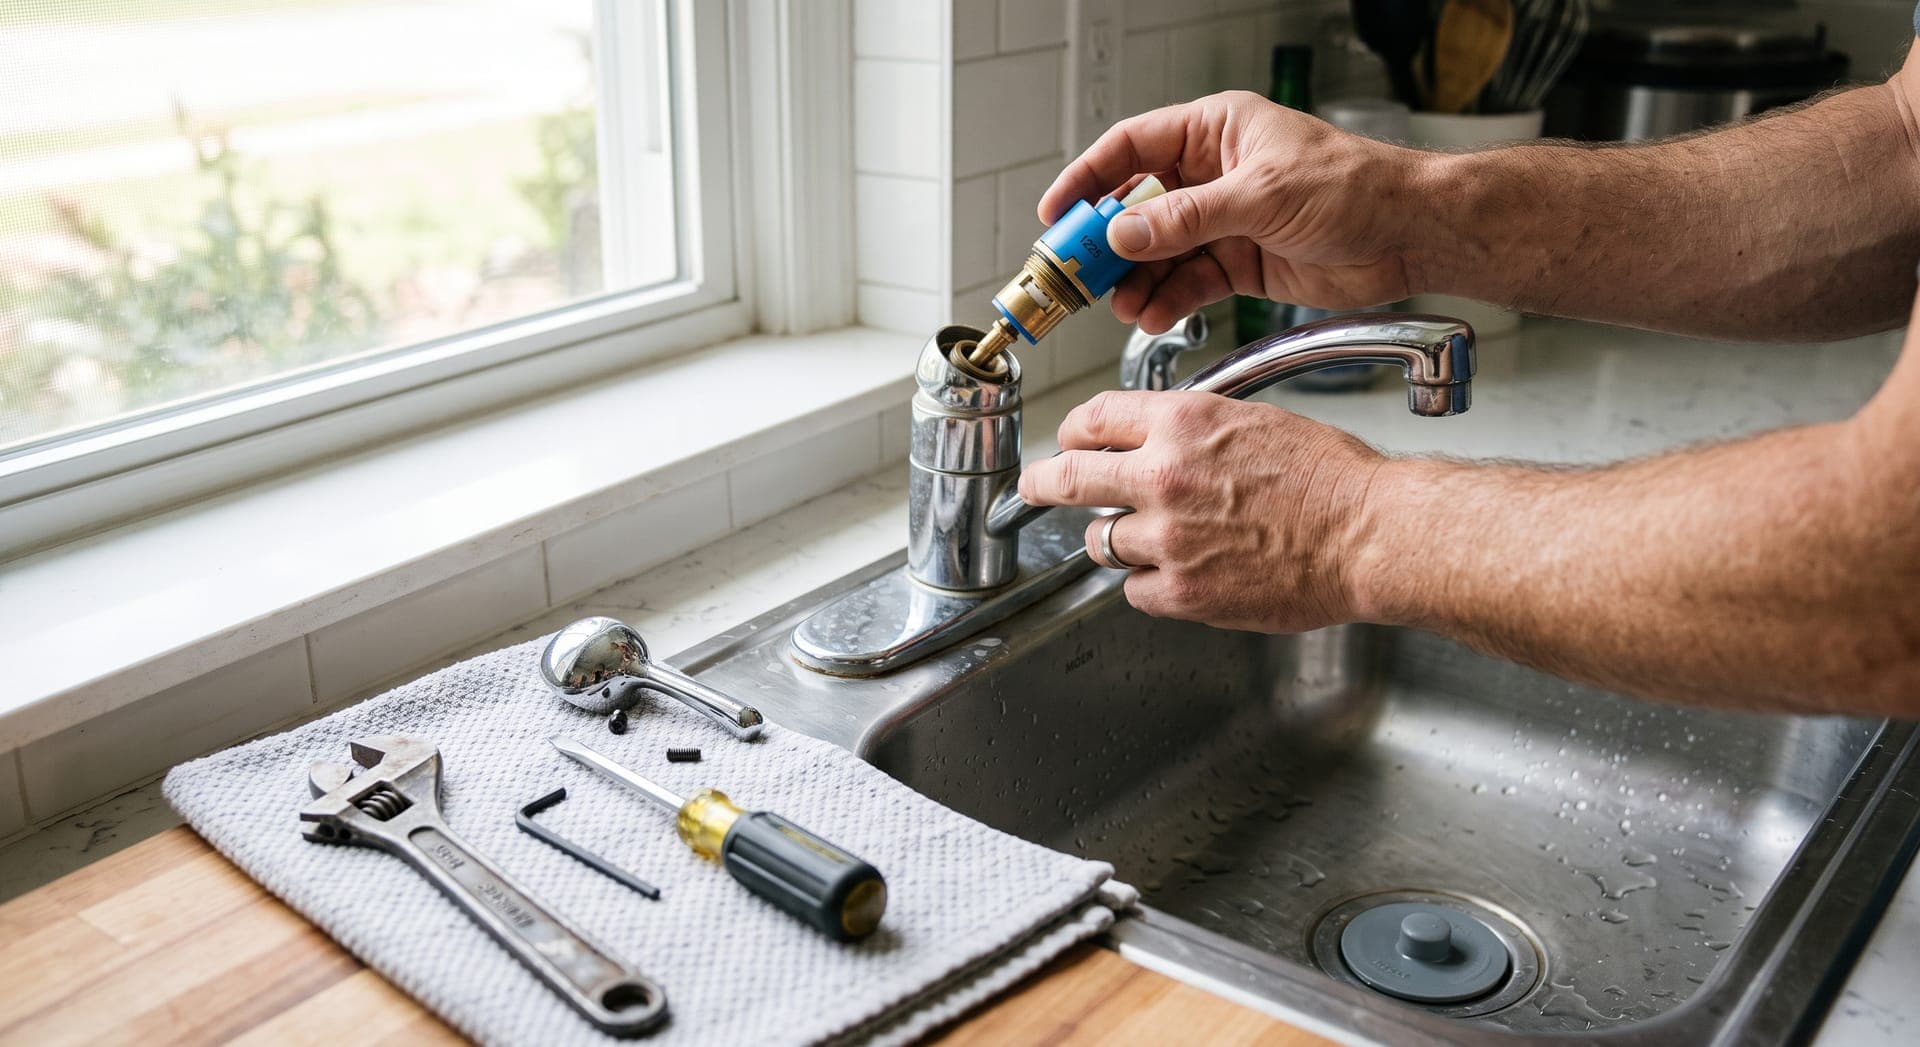
A dripping faucet is one of the most common plumbing repairs and one of the most manageable. Inside every faucet is a part that opens and closes the water flow: a rubber washer, a cartridge, a ball, or a pair of ceramic discs. Over time that part, or the rubber seals around it, wears out. Replacing it usually fixes the drip.
The hard part is knowing what is inside before you open it. This guide shows you how to identify your faucet type, take it apart safely, and replace the right part. It also lists the signs that a leak needs a plumber.
Find out where the water is coming from
Where the leak appears tells you which part has failed.
- Water drips from the spout when the faucet is off: the washer, cartridge, or seals that close the flow are worn.
- Water seeps around the base of the handle when the faucet is on: an O-ring or packing around the stem has worn.
- Water collects around the base of the spout on a kitchen faucet: the O-rings on the spout body have worn.
- Water appears in the cabinet under the sink: the leak is probably at a supply line connection or the drain, which is a different repair. Dry everything with a towel, then run the faucet and watch each joint with a flashlight to find the source.
Identify your faucet type
Look at the handles and how they move. If you can find the brand name on the faucet, note it down too, because replacement cartridges are often brand specific.
| Type | How to recognize it | Usual repair |
|---|---|---|
| Compression | Two handles, separate hot and cold. You turn them several times and tighten them to stop the flow. | Replace the rubber washer and, if needed, the O-ring |
| Cartridge | One or two handles that move smoothly with no tightening at the end. Single-lever versions lift up and down. | Replace the cartridge |
| Ball | A single handle on top of a rounded, dome-shaped cap. Common on older kitchen faucets. | Replace the seats, springs, and O-rings with a repair kit |
| Ceramic disc | A single lever on top of a wide, cylinder-shaped body. | Clean or replace the disc cartridge and its seals |
Tools and parts
- Adjustable wrench and slip-joint pliers.
- Flathead and Phillips screwdrivers, and a set of Allen (hex) keys.
- A soft cloth or tape to protect chrome from wrench marks.
- The replacement part. Buy it after you remove the old one, so you can match it exactly.
- White vinegar and an old toothbrush for mineral deposits.
- Plumber's grease, which is silicone based and safe for rubber seals.
Take the faucet apart
- Close both shutoff valves under the sink by turning them clockwise. Then open the faucet to release the pressure and confirm the water is off.
- Put the plug in the drain or cover it with a cloth. Small screws and clips will roll straight into it otherwise.
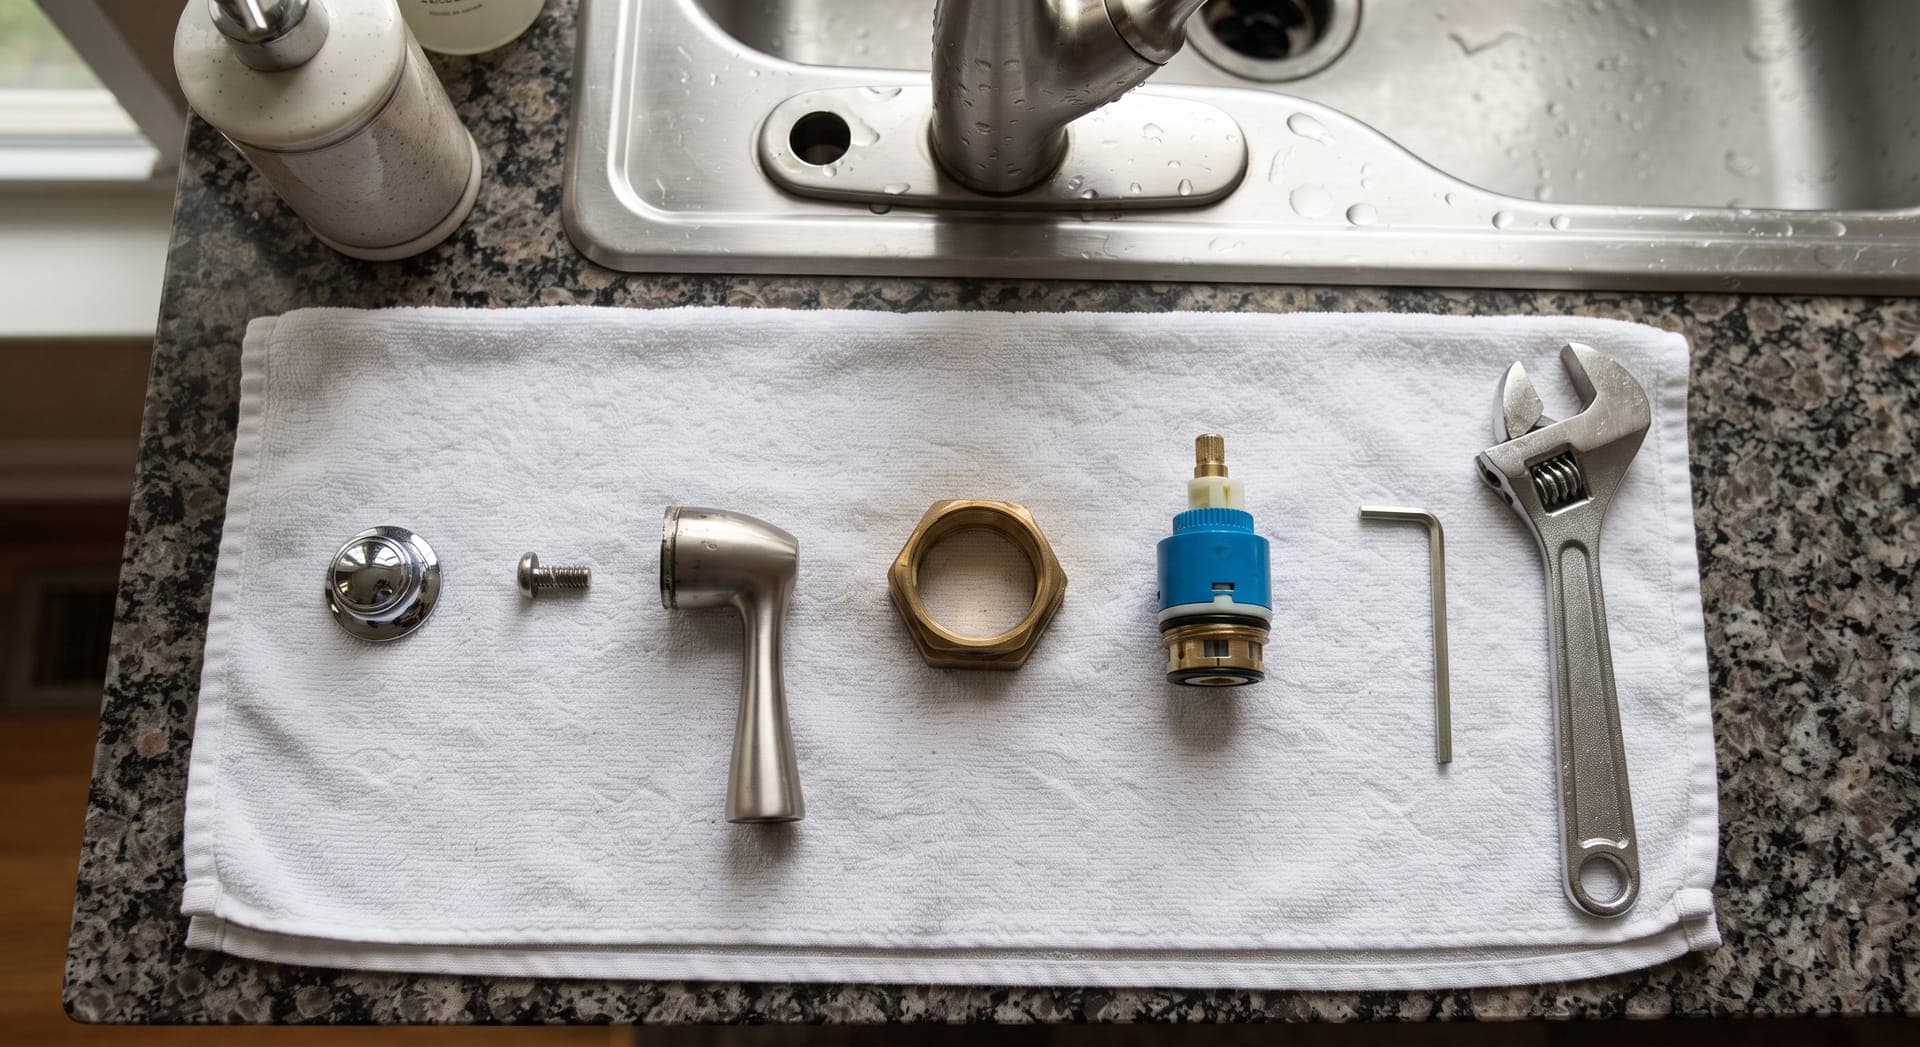
- Lay a towel on the counter and set out each part in order as you remove it. Take a photo at every step. These photos are your reassembly instructions.
- Pry off the decorative cap on the handle, if there is one, with a flathead screwdriver. Under it is a screw. Some handles have a small hex set screw on the side or back instead.
- Remove the screw and lift the handle off. If it is stuck, wiggle it gently; avoid levering against the faucet body.
- Unscrew the retaining nut, or pull out the retaining clip, that holds the cartridge or stem in place. Protect the finish with a cloth.
- Pull the cartridge or stem straight out. Note which way it faces, because many cartridges only work in one orientation.
Replace the worn part
Compression faucets
At the bottom of the stem is a rubber washer held by a brass screw. Remove the screw, replace the washer with one of exactly the same size and shape, and replace the screw if it is corroded. If the handle was leaking, replace the O-ring on the stem as well. Coat new rubber parts lightly with plumber's grease.
Look into the faucet body with a flashlight at the valve seat, the brass ring the washer presses against. If it is pitted or rough, a new washer will wear out quickly. Seats can be removed with an inexpensive seat wrench and replaced, but if the seat is part of the body and cannot be removed, the faucet may need replacing.
Cartridge faucets
Take the old cartridge to a hardware or plumbing supply store and match it. Cartridges that look alike often differ in length or spline count. Insert the new one in the same orientation as the old, with any tabs lined up. If hot and cold come out reversed after reassembly, the cartridge needs rotating 180 degrees.
Ball faucets
Buy a repair kit for your faucet brand. Under the ball are two small rubber seats with springs. Lift them out with a small screwdriver, push the new springs and seats into place, and replace the O-rings on the faucet body if the spout was leaking. Reinstall the ball, lining up its pin with the slot in the body.
Ceramic disc faucets
The ceramic discs themselves rarely wear out, but the rubber seals underneath them do, and mineral grit can stop the discs sealing. Remove the cartridge, clean the seals and openings with vinegar and a soft brush, and replace the seals. If the discs are cracked or the leak continues, replace the whole cartridge.
Reassemble and test
- Clean any mineral scale from the faucet body with vinegar on a cloth before putting parts back.
- Reassemble in reverse order, using your photos. Tighten nuts snugly, but stop when you feel firm resistance. Overtightening can crack parts or damage new seals.
- Set the faucet handle to the open position, then open the shutoff valves slowly. Air and water will sputter at first.
- Close the faucet and watch the spout and handle for a few minutes. Check under the sink too.
If the water flow is weak after the repair, unscrew the aerator at the tip of the spout. Grit loosened during the repair often collects in its screen. Rinse it and screw it back on.
Mistakes to avoid
- Skipping the shutoff valves because the repair "only takes a minute".
- Buying a part before removing the old one. Universal parts often do not fit.
- Using pipe wrenches or pliers directly on chrome without a cloth.
- Forcing a stuck cartridge with a hammer or long lever. You can crack the faucet body.
- Forgetting to plug the drain.
When to call a plumber
Stop and call a licensed plumber if
- The shutoff valves under the sink will not close fully or start leaking when you turn them.
- Parts are seized and will not come out without force.
- The faucet body is cracked, or the valve seat is damaged and cannot be replaced.
- Water is leaking inside the wall, under the floor, or from the pipes rather than the faucet.
- The pipes are visibly corroded, or the house has old galvanized steel plumbing.
If the faucet is old and parts are hard to find, replacing the whole faucet can make more sense than repairing it. That is a moderate DIY job when the shutoffs and supply lines are in good condition, and a quick job for a plumber when they are not. The guide to when to DIY and when to call a professional covers other plumbing jobs.
Questions about leaking faucets
Is a small drip worth fixing straight away?
Yes. A steady drip wastes water every hour of the day, can stain the sink, and usually gets worse as the worn part deteriorates further.
My faucet has no visible screw on the handle. How do I remove it?
Look for a small hole on the side or back of the handle. That holds a hex set screw, which needs an Allen key. Some handles also hide the screw under a cap marked with the hot and cold indicator.
Can I use a universal cartridge?
Only if the package lists your faucet model. Cartridges differ between brands and even between models of the same brand, and a near fit will usually leak.
Three checks that make the repair go smoothly
Check that the shutoff valves under the sink work, identify your faucet type, and plan to take the old part to the store. With those three things done, most faucet repairs take under an hour. If your sink drains slowly as well, the guide to unclogging a sink covers that while you have the cabinet emptied.
This guide is general information. Homes, materials, and local rules differ, so check product instructions and the regulations where you live. Read the full disclaimer.